
How to Perform Car Brake Repair at Home
If you’ve ever dealt with squeaky brakes or felt that unsettling sponginess when you press the pedal, you’re not alone. Many people struggle with car brake issues and wish they could fix them at home without costly repair bills. The good news is that with the right guidance and tools, performing car brake repair at home is totally doable.
To perform car brake repair at home, first identify issues like squeaky pads or spongy brakes, then gather essential tools like a jack, wrench, and brake fluid tester. Safely lift your car using jack stands, remove the wheels, and inspect brake pads, rotors, and calipers for wear or damage.
Replace worn parts and properly bleed the brake lines to remove air bubbles. After reassembling, test your brakes for firmness and responsiveness. Following these steps guarantees safe repairs and reliable braking.
Keep going to master each part of the process.
Key Takeaways
- Inspect brake pads, rotors, and fluid for wear, leaks, or damage before starting repairs.
- Safely lift the vehicle using a jack and secure it with jack stands on a flat surface.
- Remove wheels and calipers carefully, then replace worn brake pads and rotors as needed.
- Bleed the brake system thoroughly to remove air bubbles and ensure firm pedal response.
- Test brakes after repair with low-speed stops and check fluid levels for safe, effective braking.
How to Identify Squeaky Pads, Spongy Brakes & Other Problems at Home

Before you plunge into brake repairs, you need to recognize the signs that your brakes are failing. One common indicator is squeaky pads, which usually means you’re dealing with excessive pad wear. When the pads get too thin, they create a high-pitched noise every time you brake. You should inspect the pads visually or listen carefully when driving.
Another red flag is spongy brakes, which feel soft or mushy when you press the pedal. This often points to low or contaminated brake fluid, which reduces hydraulic pressure. If you notice your brake pedal sinking closer to the floor, it’s a clear sign you should check the brake fluid level immediately.
Furthermore, uneven braking or pulling to one side can signal worn pads or uneven brake fluid distribution. By identifying these symptoms early, you’ll save yourself time and avoid more expensive repairs down the road.
Gathering the Essential Tools for DIY Brake Repair
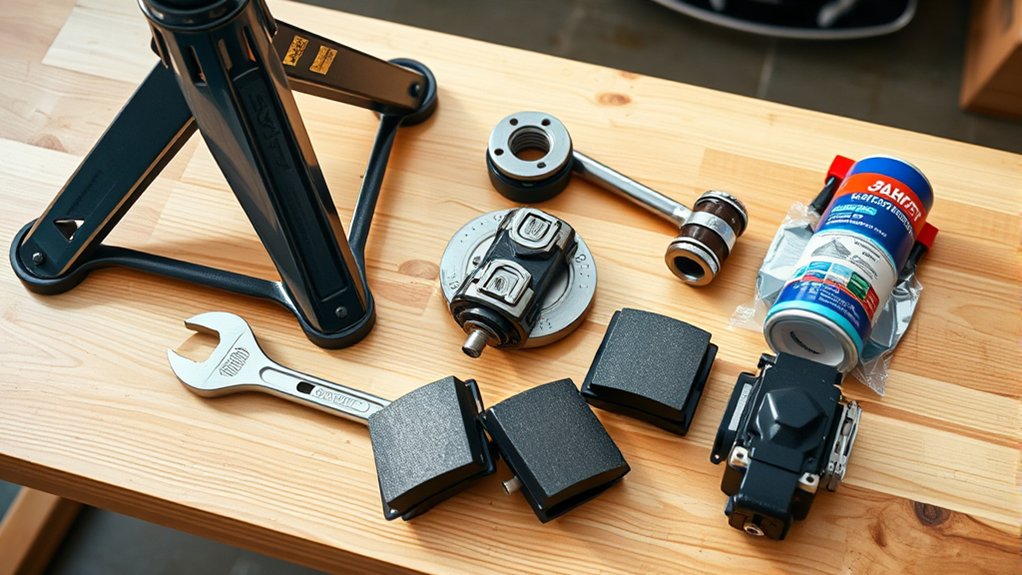
Recognizing brake problems like squeaky pads or spongy pedals is only the first step. You’ll need the right tools to fix them properly. Start by gathering a reliable jack and jack stands to safely lift and secure your car later.
Next, get a lug wrench to remove the wheels and a C-clamp or brake caliper tool to compress the caliper pistons when replacing worn pads. You’ll also need a set of wrenches or sockets to loosen bolts holding the brake components.
Don’t forget a brake fluid tester or a clear container to check and handle brake fluid safely, as it’s vital for maintaining proper hydraulic pressure. A wire brush helps clean rust and debris off brake parts, improving performance.
Finally, keep a flashlight handy to inspect pad wear carefully and spot any hidden damage. With these essential tools ready, you’ll be well-equipped to tackle brake repair confidently and effectively.
Safely Lifting and Securing Your Car

When you’re ready to work on your brakes, lifting and securing your car properly is essential for safety. First, park on a flat surface and engage the parking brake to prevent any movement. Use wheel chocks behind the wheels that will stay on the ground.
Next, locate the manufacturer’s recommended jacking points, usually found in your owner’s manual, to avoid damaging your car’s frame. Use a reliable hydraulic jack to lift the vehicle and place sturdy jack stands under the frame for support. Never rely solely on the jack.
Once your car is secure, double-check stability before crawling underneath. This setup ensures you can safely inspect brake components without risk. Remember, improper lifting can affect brake fluid and pedal feel, leading to unsafe braking performance.
Removing the Wheel and Inspecting Brake Components
Now that your car is securely lifted, go ahead and start by loosening the lug nuts and removing the wheel. Once you’ve got the wheel off, take a close look at the brake components. Check for any signs of wear, damage, or leaks. This step is really important because it helps you figure out what might need to be repaired or replaced.
Wheel Removal Steps
Before you can access the brake components, you’ll need to safely remove the wheel. Start by loosening the lug nuts with a wrench while the car is on the ground to prevent the wheel from spinning.
Then, use a jack to lift the vehicle securely, making sure to place jack stands for safety. Fully remove the lug nuts and carefully pull the wheel off.
As you set the wheel aside, take care not to disturb the ABS sensors or brake fluid lines nearby. They’re delicate and essential for proper brake function. Avoid any contact that could damage these components.
With the wheel off, you’ll have clear access to the brake parts for repair or inspection in the next steps. Always work methodically to keep everything intact and prevent fluid leaks.
Brake Component Inspection
Once you’ve removed the wheel carefully, you gain direct access to the brake components. Start by inspecting the brake pads for wear; if they’re less than 3mm thick, it’s time to replace them.
Next, check the brake rotor for grooves or warping. Look out for any leaks around the caliper, especially where brake fluid might be seeping. Low brake fluid levels could indicate a leak or worn pads.
Also, verify the brake caliper moves smoothly and isn’t stuck. If you notice any irregularities, it might affect brake calibration, which is critical for proper braking performance.
Finally, give the brake lines a quick once-over for cracks or damage. Performing this inspection thoroughly helps maintain your car’s safety and brake efficiency.
When and How to Replace Brake Pads
Although brake pads are designed to last thousands of miles, you’ll need to replace them when they become too thin or start making squealing noises. Ignoring worn pads can damage other parts like ABS sensors and reduce brake fluid effectiveness.
Here’s how to replace them safely:
- Lift your car and remove the wheel to access the brake assembly.
- Remove the caliper bolts carefully, then slide off the caliper without stressing the brake fluid line.
- Take out the old brake pads, checking for damage to ABS sensors nearby.
- Install new pads, then reattach the caliper and wheel. Make sure to pump the brake pedal to reset brake fluid pressure before driving.
Replacing brake pads yourself saves money and helps you understand your brake system better. Always double-check for leaks or sensor issues after the job.
When and How to Replace Brake Rotors
You’ll know it’s time to replace your brake rotors when you start feeling vibrations, hearing squealing, or seeing visible grooves. When that happens, the next step is to remove the caliper and the old rotor carefully so you don’t cause any damage. Let’s walk through the step-by-step process to get your rotors replaced safely at home.
Signs Rotor Replacement Needed
When your car starts vibrating during braking or you hear squealing noises, it’s a clear sign that your brake rotors may need replacement. Ignoring these signs can lead to uneven brake fluid pressure and affect ABS sensors, which can compromise your safety.
Here are 4 key signs to watch for:
- Deep grooves or scoring on the rotor surface.
- A noticeable decrease in braking performance or increased stopping distance.
- Rotor thickness below the manufacturer’s minimum specification.
- Persistent brake noise despite replacing brake pads.
If you notice these symptoms, it’s time to inspect your rotors closely. Replacing worn rotors ensures your brake fluid maintains proper pressure and your ABS sensors function correctly, keeping your braking system reliable.
Step-by-Step Rotor Removal
Before replacing your brake rotors, make sure your vehicle is securely lifted and the wheels are removed to access the rotor assembly easily. First, engage the parking brake to prevent any movement.
Next, remove the caliper bolts and carefully slide the caliper off the rotor. Support it with a hanger to avoid stressing the brake fluid lines. Then, take off the caliper bracket if necessary.
If the rotor is stuck, tap it gently with a rubber mallet to loosen it. Once free, remove the rotor from the hub. Clean the hub surface before installing the new rotor to ensure proper fit.
Bleeding Brake Lines to Get Rid of Air Bubbles
How do you guarantee your brakes respond smoothly after repair? Bleeding brake lines is essential to remove air bubbles that cause a spongy brake feel. Since different brake fluid types react differently, always use the right fluid recommended for your car. Also, consider your brake pad materials, as some require specific fluid compatibility.
Here’s how to bleed your brakes effectively:
- Prepare the system: Fill the master cylinder with fresh brake fluid matching your car’s specs.
- Locate bleeder screws: Find them on each brake caliper or wheel cylinder.
- Bleed each wheel: Have a helper press the brake pedal while you open the bleeder screw to release air and fluid. Close it before they release the pedal.
- Repeat until clear: Continue until no air bubbles appear in the fluid.
Bleeding ensures your brake system maintains proper hydraulic pressure for safe, reliable stopping.
How to Test Your Brakes Before Driving Again
Before you hit the road, it’s a good idea to take a quick look at your brakes. Check for any leaks or parts that might be loose. Once that’s done, go ahead and press the brake pedal a few times. You want to make sure it feels firm and responds right away. Doing these simple checks can really give you peace of mind that your repair is solid and safe.
Visual Brake Inspection
Although you’ve completed the brake repairs, you shouldn’t jump back into driving without first performing a thorough visual brake inspection. This step guarantees everything is in place and safe.
- Check the brake fluid level in the reservoir. It should be within the recommended range and free of debris.
- Inspect the brake calipers for any signs of leaks, corrosion, or damage.
- Look over the brake pads and rotors for wear or uneven surfaces that could affect braking.
- Make sure the brake lines and hoses are intact without cracks or leaks.
Taking these quick steps helps confirm your repair work is solid before you hit the road again. Safety first!
Brake Performance Check
Wondering if your brakes are truly ready to keep you safe on the road? Start by checking the brake fluid level; low fluid can signal leaks or worn components.
Next, press the brake pedal. It should feel firm, not spongy. If it sinks to the floor, you might have air in the lines or a fluid issue.
Engage the parking brake and verify it holds the car securely on an incline without slipping.
Then, carefully test your brakes at low speed in a safe area. Notice any unusual noises, vibrations, or pulling to one side.
If everything feels solid and responsive, your brake repair is likely successful. If not, double-check your work before hitting the road to keep yourself and others safe.
Brake Maintenance Tips After Repair
Once you’ve completed your brake repair, maintaining your brakes properly guarantees they continue to perform safely and effectively. Here are four essential tips to keep your braking system in top shape:
1. Check Brake Fluid Regularly
Brake fluid is crucial for hydraulic pressure. Inspect its level and quality monthly to avoid contamination or leaks that could impair braking.
2. Inspect Brake Calipers
Make sure the calipers move smoothly and aren’t sticking. Clean and lubricate the caliper slides to prevent uneven wear and ensure proper pad contact.
3. Monitor Brake Pads and Rotors
Keep an eye on pad thickness and rotor condition. Replace worn pads promptly and resurface or replace rotors if you notice scoring or warping.
4. Test Brakes After Maintenance
Always perform a cautious road test after repairs or maintenance. Check for unusual noises, vibrations, or reduced responsiveness to confirm everything works well.
Following these steps will help you maintain reliable, safe brakes after your repair.
Avoid These Common Brake Repair Mistakes
When you take on brake repairs yourself, it’s easy to make mistakes that compromise safety and performance. One common error is neglecting to properly bleed the brake fluid system, which can leave air bubbles that reduce braking efficiency. Always ensure you fully flush and replace old brake fluid.
Another frequent mistake involves improper handling or installation of brake calipers. If you don’t secure calipers correctly or reuse damaged parts, you risk uneven brake pad wear or caliper failure.
Avoid mixing old and new brake fluid, as this can contaminate the system and cause corrosion. Also, don’t overlook inspecting brake lines for leaks or damage during your repair. Skipping these steps may lead to brake failure or costly future repairs.
Frequently Asked Questions
What Type of Brake Fluid Should I Use for My Car?
You should use the brake fluid type specified in your car’s owner manual, usually DOT 3, DOT 4, or DOT 5.1. Make sure you check fluid compatibility because mixing different brake fluid types can damage your braking system.
Avoid using DOT 5 unless your vehicle specifically requires it, as it’s silicone-based and incompatible with DOT 3 or 4. Always choose the right brake fluid types to keep your brakes working safely and efficiently.
How Often Should Brake Pads Be Replaced Under Normal Driving Conditions?
Brake pad wear has a big impact on your brake pad lifespan. Typically, you should replace brake pads every 30,000 to 70,000 miles under normal driving conditions. However, your driving style, road conditions, and vehicle type can cause variations.
Keep a close check on squeaks, grinding sounds, or reduced braking power. These signs signal worn brake pads that need replacement to guarantee safety and smooth stopping every time you hit the brakes.
Can I Use Aftermarket Brake Parts Safely on My Vehicle?
Yes, you can use aftermarket brake parts safely on your vehicle if you choose quality components. A brake pad upgrade or brake system upgrade from reputable brands often offers better performance and durability than stock parts.
Just make sure the parts meet or exceed your vehicle’s specifications and are compatible with your braking system. Proper installation and regular maintenance will keep your brakes reliable and safe on the road.
What Are the Signs of a Failing Brake Master Cylinder?
If your brakes feel like they’re fading into a fog, you might be facing a failing brake master cylinder. Watch for brake fluid leaks under your car, as if it’s quietly bleeding.
You might also hear a strange master cylinder noise, like a low, unsettling hum when you press the pedal. Your brake pedal may sink to the floor or feel spongy, signaling it’s time to check that essential component before it’s too late.
How Do Weather Conditions Affect Brake Performance?
Weather impacts your brake sensitivity markedly. In wet or icy conditions, your brakes may feel less responsive because moisture reduces friction between brake pads and rotors.
Cold weather can also thicken brake fluid, slowing its movement and making your brakes less effective. On hot days, brakes might overheat, causing fading and reduced sensitivity.
You should always adjust your driving and brake usage based on weather to maintain safe stopping distances.
Conclusion
Now that you’ve played mechanic and tamed those squeaky pads and spongy brakes, imagine your car singing a smooth, confident tune instead of a wailing banshee. You’ve got the tools, the know-how, and the courage to lift your car like a pro.
Just remember, brake repair isn’t a magic trick, so skip the shortcuts unless you want your car to audition for a roller coaster ride. Drive safe, and enjoy your new role as a roadside magician with the skills to perform car brake repair at home!