How to Perform Muffler Car Repair at Home
If you’ve ever dealt with a noisy or malfunctioning muffler, you’re not alone. Many people struggle with muffler issues that affect their car’s performance and comfort. The good news is, you don’t always have to rush to a mechanic.
With the right guidance and tools, muffler car repair at home is something you can tackle yourself.
You can fix your muffler at home by first spotting issues like loud noises, rust, or vibrations. Use basic tools like a jack, wrenches, and exhaust tape or patch kits for small repairs.
For severe rust or holes, replacement is best. Safely lift your car, loosen bolts, remove the old muffler, then install and align the new one securely. Keep an eye on fit and any leaks afterward.
There’s plenty more to help you master muffler repair properly.
Key Takeaways
- Inspect the muffler for rust, holes, or damage by visually checking it and listening for unusual sounds while the engine runs.
- Use a jack and jack stands to safely elevate the vehicle before loosening clamps and bolts with the right tools.
- Clean rusted areas with a wire brush. For small holes, apply muffler tape or patch kits as a temporary fix.
- Remove the damaged muffler carefully, then install the new or repaired muffler. Secure it tightly with clamps and hangers.
- After installation, check for leaks and proper alignment by running the engine and feeling for escaping gases or unusual noises.
How to Spot Common Muffler Problems Fast

How can you quickly tell if your muffler needs attention? Start by listening for unusual sounds. A properly working muffler keeps engine noise low, so if you hear loud roaring or rattling, it’s a clear sign your muffler might be damaged or rusted.
Muffler customization often focuses on noise reduction, so any change in sound quality or volume should raise a red flag. Next, check for visible damage or holes on the muffler’s surface. Rust spots or cracks can cause exhaust leaks and reduce performance.
You might also notice a drop in fuel efficiency or a strong exhaust smell inside your car, both indicating muffler issues. Lastly, if you feel vibrations while driving, your muffler’s mounting might be loose or broken.
What Tools You’ll Need for Muffler Repair
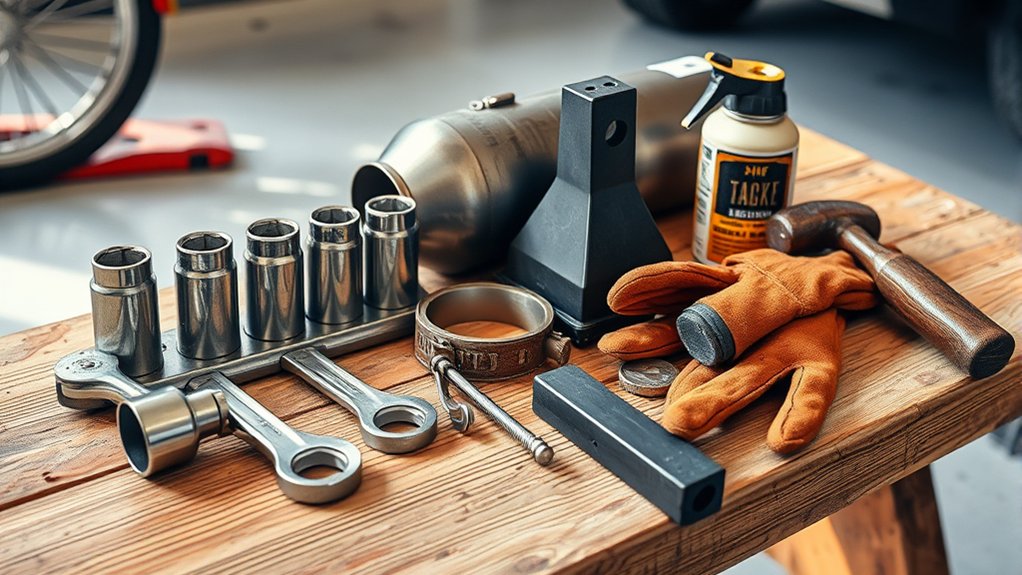
After identifying signs that your muffler needs attention, gathering the right tools will make the repair process smoother and more efficient. You’ll need a jack and jack stands to safely lift your car, giving you access to the muffler. A socket set and wrenches are essential for removing bolts and clamps securing the muffler material.
If rust or corrosion is present, a wire brush helps clean surfaces for better noise reduction once repaired. You’ll also want a hacksaw or reciprocating saw to cut through damaged sections if necessary.
For patching small holes, aluminum tape or muffler repair clamps come in handy. Don’t forget safety gear like gloves and safety glasses to protect yourself during the repair.
Having these tools ready will let you address muffler issues confidently, ensuring your car maintains proper noise reduction and exhaust function.
Deciding: Patch or Replace Your Muffler?
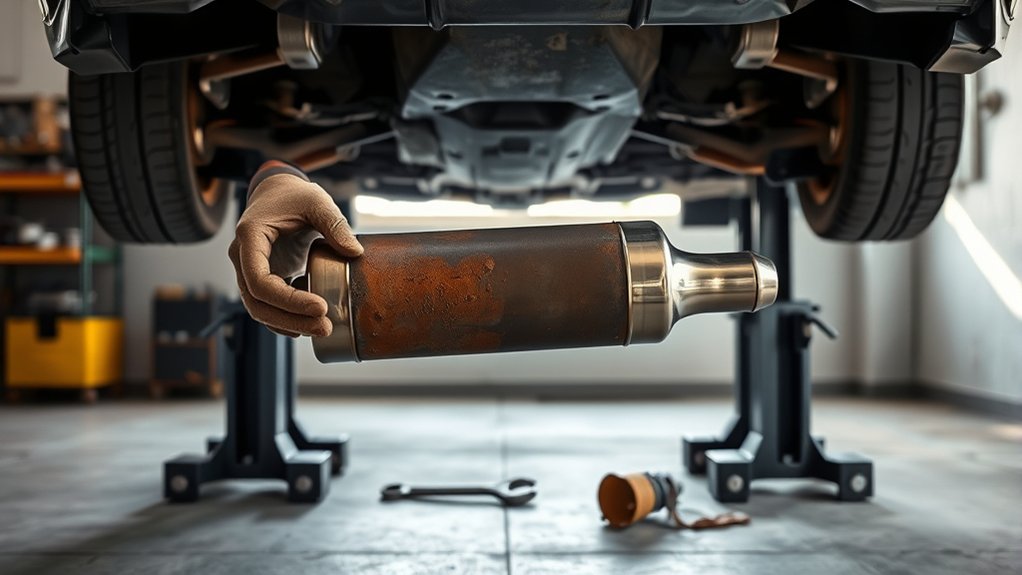
You’ll want to take a close look at how damaged your muffler really is before making a decision. If it’s just small holes or a few rust spots, patching might do the trick. But if the damage is more extensive, replacing it is usually the better call. It’s a good idea to compare the costs of patching versus replacing so you can pick the option that works best for your budget and gets the job done right.
Assessing Muffler Damage
Before deciding whether to patch or replace your muffler, carefully examine the extent of the damage. Check for rust, holes, or cracks, and consider the muffler materials. Steel or aluminized steel tend to last longer.
Noise reduction is a key indicator. If your muffler’s effectiveness has dropped considerably, replacement might be necessary.
| Damage Type | Recommended Action |
|---|---|
| Small holes/rust | Patch with muffler tape |
| Large holes/cracks | Replace muffler |
| Severe corrosion | Replace muffler |
If the damage is minor, a patch can restore functionality and noise reduction. However, extensive damage or corrosion means the muffler’s integrity is compromised. This reduces its noise reduction ability and requires replacement for safety and performance.
Cost Comparison Factors
While deciding whether to patch or replace your muffler, consider the costs involved carefully. Your choice affects not only immediate expenses but also long-term benefits like fuel efficiency and noise reduction. Here are three key factors to weigh:
- Repair Cost vs. Replacement Cost: Patching is cheaper upfront, but if the damage is extensive, replacement might save money over time.
- Impact on Fuel Efficiency: A damaged muffler can lower fuel efficiency. Replacing often restores peak performance, saving on gas.
- Noise Reduction: Patches may reduce noise temporarily, but a new muffler ensures consistent noise control.
Balancing these factors helps you make a smart decision that fits your budget and keeps your car running smoothly.
Safely Lifting Your Car for Muffler Work
Since working under your car requires stability, you must lift it safely to prevent accidents. Use a sturdy jack and secure jack stands to hold the vehicle firmly. Never rely solely on a jack because it can fail, risking injury. Proper lifting not only guarantees your safety but also allows you to perform precise engine tuning and muffler repairs, which directly affect fuel efficiency.
Follow this quick guide to lift your car safely:
| Step | Key Point |
|---|---|
| Choose flat ground | Prevents slipping or rolling |
| Use wheel chocks | Blocks wheels for stability |
| Position jack correctly | Use manufacturer’s lift points |
| Place jack stands | Support car weight securely |
| Double-check setup | Ensure no movement before work |
Inspecting Your Muffler and Exhaust System
First, take a look at your muffler and see if you can spot any dents, rust, or holes. Next, turn on the engine and listen carefully to catch any unusual noises. After that, check all the connections in your exhaust system to make sure they’re tight and secure. It’s a straightforward process that can help you keep things running smoothly.
Visual Muffler Damage Check
Before you plunge into any repairs, take a close look at your muffler and exhaust system to spot visible signs of damage. The muffler design often affects car aesthetics, so damage can be both functional and cosmetic. Here’s what to check:
- Rust and Corrosion: Look for flaky rust or holes on the muffler surface. These weaken its structure and harm your car’s appearance.
- Dents or Cracks: Inspect for any dents or cracks that could disrupt exhaust flow or alter the muffler design. This impacts both performance and looks.
- Loose or Broken Hangers: Make sure the muffler hangs securely. Damaged hangers can cause vibrations and misalignment, affecting function and aesthetics.
Spotting these issues early helps maintain your car’s style and prevents worsening damage before you start repairs.
Listen for Unusual Noises
While inspecting your muffler visually is important, listening for unusual noises can reveal hidden problems that aren’t immediately visible. Start your engine and pay close attention to any rattling, hissing, or loud rumbling sounds. These noises often indicate issues with sound insulation or holes in the muffler that compromise its effectiveness.
A damaged muffler may fail to dampen noise properly, alerting you to potential leaks or corrosion. Moreover, unusual sounds might signal that your vehicle isn’t meeting emission standards, which could lead to failed inspections or environmental harm.
Examine Exhaust System Connections
Hearing unusual noises from your muffler often points to issues with the exhaust system’s connections. To prevent further damage, you need to carefully examine the exhaust pipe and connection joints.
Start by visually inspecting the exhaust pipe for cracks, rust, or holes that could leak gases. Then, check the connection joints where the exhaust pipe meets the muffler and other parts for looseness or corrosion.
Next, gently shake the exhaust pipe to detect any movement or rattling that might indicate worn or broken clamps. If you find any damaged or loose parts, tighten or replace them promptly.
Maintaining secure connection joints guarantees your exhaust system functions properly and reduces noise and harmful emissions. Regular checks will keep your muffler and exhaust system in top shape.
How to Patch Small Holes and Leaks in Your Muffler
If you notice small holes or leaks in your muffler, you can fix them yourself quickly and save a trip to the mechanic. Start by cleaning the area around the hole to guarantee proper adhesion.
Because muffler design focuses on sound dampening, sealing these leaks restores performance and reduces noise. Use high-temperature muffler patch kits or exhaust tape for a durable fix.
Here’s a quick comparison of common patch materials:
| Patch Material | Durability |
|---|---|
| Exhaust Tape | Short-term |
| Muffler Patch Kit | Medium-term |
| Epoxy Putty | Medium-term |
| High-temp Metal Tape | Long-term |
Apply the chosen patch firmly, following instructions, and let it cure completely before driving. Regularly inspect patched areas to maintain your muffler’s sound dampening efficiency and prevent further damage.
When to Replace a Rusted Muffler: And How to Do It
You’ll know it’s time to replace your muffler when rust causes holes or weak spots that just can’t be patched up. So, the first thing you want to do is take a good look at how bad the damage really is. That way, you can figure out if you need to replace the whole thing or if a simple fix might do.
Once you’ve made that call, you can move on to the next step. Just follow a straightforward, step-by-step guide to safely remove the old muffler and get your new one installed. It’s easier than you might think!
Signs of Muffler Rust
Although mufflers are designed to withstand harsh conditions, rust can still take its toll over time. You’ll want to check for signs of rust regularly, especially if your muffler branding looks faded or you’re considering aftermarket options.
Here are three clear signs your muffler might be rusting:
- Visible Rust Spots: Look for flaky, brownish areas on the muffler’s surface.
- Loud Exhaust Noise: Rust can create holes that increase noise levels.
- Decreased Fuel Efficiency: Rust damage restricts airflow, making your engine work harder.
Spotting these signs early means you can address rust before it worsens. Keep an eye on these indicators to decide when it’s time to replace your muffler, whether sticking with your current brand or switching to aftermarket options.
Assessing Muffler Damage
When rust starts compromising your muffler’s integrity, it’s crucial to determine whether repair or replacement is necessary. You should first evaluate the extent of rust damage by comparing your muffler to historical muffler styles, which often had thicker steel less prone to corrosion.
Next, consider muffler branding comparisons. Premium brands typically use rust-resistant materials, making them last longer. Use this table to assess damage severity:
| Rust Severity | Effect on Performance | Recommended Action |
|---|---|---|
| Light Surface | Minimal noise, slight wear | Clean and monitor |
| Moderate | Increased noise, minor leaks | Patch or prep for replace |
| Heavy Rust | Structural failure, holes | Replace immediately |
If rust causes holes or weak spots, it’s time to replace your muffler rather than repair it.
Step-by-Step Replacement Guide
Since a rusted muffler can severely affect your vehicle’s performance and safety, replacing it promptly is essential. Ignoring excessive muffler noise and increased exhaust emissions can lead to bigger issues. Here’s a simple step-by-step replacement guide:
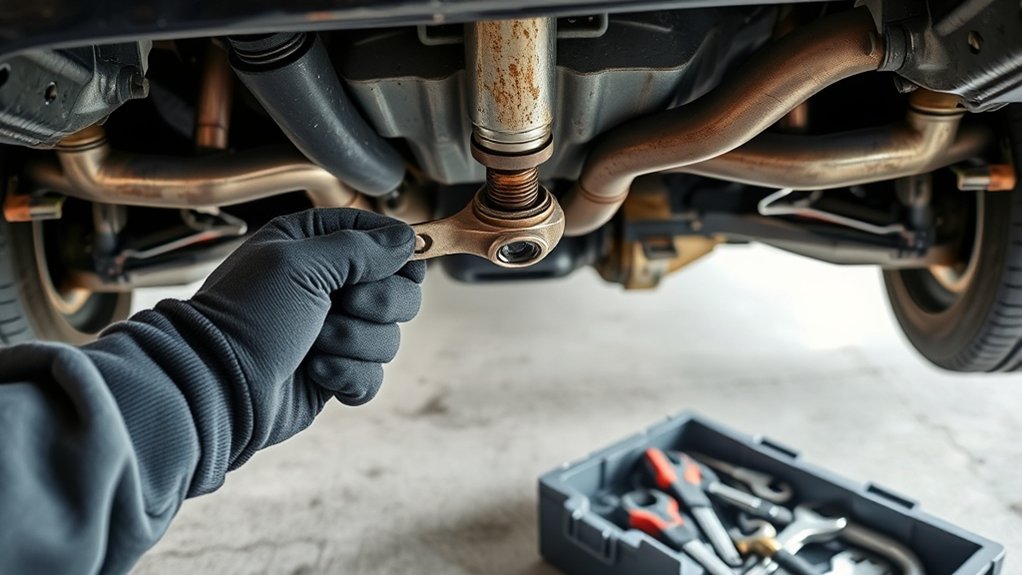
- Remove the old muffler: Use a wrench to loosen clamps and bolts, then carefully detach the rusted muffler from the exhaust pipe.
- Inspect and clean: Check the exhaust pipe for damage and clean any rust or debris to ensure a tight fit for the new muffler.
- Install the new muffler: Align the new muffler, secure it with clamps and bolts, then tighten everything firmly to prevent leaks and reduce muffler noise.
Removing and Installing a New Muffler Step-by-Step
Before you start removing the old muffler, make sure your car is securely lifted and cooled down to prevent injuries. Begin by spraying penetrating oil on the exhaust clamps and bolts to loosen rust and make removal easier. Use a wrench or socket set to carefully remove these fasteners.
Detach the muffler from the exhaust hangers by gently prying them off with a pry bar or hanger removal tool. Keep an eye out for muffler noise or unusual vibrations, which can indicate improper installation or damage.
To install the new muffler, slide it into position on the exhaust pipe and align it with the hangers. Secure it using new clamps or bolts, tightening them firmly to prevent exhaust fumes from leaking.
Double-check that all connections are tight, and the muffler sits securely. This step-by-step approach helps you replace your muffler safely, reducing muffler noise and keeping harmful exhaust fumes from escaping.
Checking Muffler Fit and Alignment After Repair
Although you’ve just installed the new muffler, you shouldn’t assume it fits perfectly without checking. Proper fit and alignment are essential for ideal muffler design and effective noise reduction. Here’s how to ensure everything’s spot on:
- Visual Inspection: Look for any gaps between the muffler and exhaust pipes. Make sure clamps and hangers hold the muffler securely without forcing or bending parts.
- Alignment Check: Confirm the muffler sits straight and aligns with the exhaust system. Misalignment can cause leaks and reduce noise reduction efficiency.
- Test for Leaks: Start the engine and listen closely. Any unusual noise indicates a poor seal or misfit. Also, feel around carefully for escaping gases.
Muffler Maintenance Tips to Keep Problems Away
After confirming your muffler fits and aligns properly, keeping it in good condition will help you avoid future issues. Regularly inspect the muffler design for signs of rust, cracks, or holes, as these can compromise its function and lead to louder noise or reduced efficiency.
Confirm proper fit and alignment, then regularly inspect for rust, cracks, or holes to prevent muffler issues.
Clean the muffler’s exterior to prevent buildup that accelerates corrosion. You should also check the exhaust emissions. Unusual smoke colors or strong odors could indicate muffler problems affecting your car’s performance or environmental compliance.
Avoid driving through deep water, which may cause internal damage. Tighten any loose clamps or brackets to maintain proper alignment. If you notice increased noise or vibration, address it immediately to prevent further damage.
Routine maintenance and timely repairs ensure your muffler works as intended, optimizing exhaust flow and keeping emissions in check. By staying proactive, you’ll extend your muffler’s lifespan and maintain your vehicle’s smooth operation.
Frequently Asked Questions
How Does a Faulty Muffler Affect Fuel Efficiency?
A faulty muffler reduces your fuel economy because it disrupts the exhaust flow, making your engine work harder. When your muffler isn’t functioning properly, emission control systems can’t operate efficiently, causing increased back pressure and poor combustion.
This forces your engine to burn more fuel than necessary. So, if you want to save money at the pump and reduce harmful emissions, fixing your muffler promptly is essential.
Can Muffler Issues Cause Engine Overheating?
Yes, muffler issues can contribute to engine overheating. Studies show that nearly 30% of engine overheating cases involve exhaust system blockages.
When your muffler is damaged, exhaust fumes can’t exit properly, increasing back pressure. This forces your engine to work harder, raising noise levels and heat.
Are Muffler Repairs Covered by Car Insurance?
Insurance coverage for muffler repairs usually isn’t included unless the damage results from a covered event, like an accident or vandalism. You shouldn’t expect routine wear and tear repairs to be covered.
Since repair costs can vary, you’ll often have to pay out of pocket for muffler issues caused by normal use. It’s a good idea to check your specific policy so you know exactly what’s covered before you start repairs.
How Long Does a Typical Muffler Repair Take?
Think of muffler replacement like fixing a leaky faucet. You can get it done quickly if you have the right tools and know-how. Typically, a muffler repair takes about 1 to 2 hours.
If you’re doing a DIY repair, expect to spend extra time, especially if rust or stuck bolts slow you down. With patience and preparation, you’ll have your exhaust system running smoothly in no time.
What Are the Environmental Impacts of a Damaged Muffler?
A damaged muffler increases noise pollution, making your car louder and disturbing the environment around you. It also causes your vehicle to emit more harmful gases, meaning you won’t meet emission standards.
This not only harms air quality but can lead to fines and failed inspections. So, keeping your muffler in good shape helps protect the environment and guarantees your car runs within legal limits. Don’t ignore it!
Conclusion
Now that you know how to tackle muffler repairs at home, remember nearly 70% of exhaust system issues stem from rust and corrosion. Catching problems early saves you time and money, keeping your car running smoothly.
With the right tools and safety steps, you can handle most repairs yourself. Stay proactive with regular inspections and maintenance to avoid costly replacements down the road.
Your car and your wallet will thank you for performing muffler car repair at home!