
How to Diagnose and Fix AC Heater Car Repair Issues
Dealing with a malfunctioning car AC heater car repair can be frustrating, especially when you rely on it to stay comfortable during your drives. You’re not alone—many people struggle with getting their car’s heating system to work just right.
Whether it’s weak airflow or inconsistent temperatures, these issues can really take the joy out of your ride.
If your car’s AC heater isn’t working right, start by checking the cabin air filter, thermostat, and heater core for blockages or leaks.
Inspect the blower motor and electrical connections for damage or loose wires.
Look out for unusual noises, weak airflow, or inconsistent temperatures, as these signal issues.
Test sensors and controls with a multimeter to confirm proper function.
Following these steps can help restore comfort, and exploring further will reveal even more useful fixes and tips.
Key Takeaways
- Check for symptoms like inconsistent temperature, weak airflow, or unusual noises to identify AC heater malfunctions.
- Use a multimeter to test electrical components, wiring continuity, and sensor resistance for faults or damage.
- Inspect and replace dirty cabin air filters and flush clogged heater cores to restore proper airflow and heating.
- Detect leaks in hoses and heater core using pressure testers or UV dye. Then repair or replace damaged parts.
- Replace faulty blend door actuators, heater control valves, or thermostats to fix uneven heating or temperature fluctuations.
Is Your Car’s AC Heater Acting Up? Here’s How to Tell

If your car’s AC heater isn’t working properly, you’ll likely notice it right away. You might find that the temperature inside your vehicle doesn’t adjust as expected, leaving you either too hot or too cold.
When your climate control system fails, it affects your cabin comfort considerably. You expect a smooth changeover between heating and cooling, but a malfunctioning unit can cause inconsistent airflow or weak heat output.
You may also hear unusual noises or detect unpleasant odors, signaling issues with your AC heater. Pay attention to how long it takes for the system to respond when you adjust the temperature settings.
If the air stays lukewarm or the system stops blowing air altogether, your car’s climate control needs attention. Recognizing these signs early helps you maintain a comfortable cabin environment and prevents further damage to your vehicle’s heating and cooling system.
What’s Causing Your Car’s AC Heater Problems?

When your car’s AC heater isn’t performing well, several common issues could be to blame. A dirty or clogged cabin air filter often restricts airflow, reducing interior comfort and making it harder for the system to maintain the right temperature.
Low refrigerant levels can also cause your heater and AC to underperform. This forces the system to work harder and might lower your fuel efficiency. Another frequent cause is a faulty thermostat, which can lead to inconsistent heating and cooling inside your car.
Low refrigerant and faulty thermostats can reduce performance and fuel efficiency in your car’s heating and cooling system.
Problems with the blend door actuator may prevent air from distributing correctly, affecting your cabin’s comfort. Worn-out heater cores or leaks in the system can also reduce effectiveness and harm fuel efficiency by making your engine work harder.
Identifying these issues early helps maintain both your car’s fuel efficiency and your driving comfort. This ensures your AC heater functions properly when you need it most.
How to Diagnose Electrical Issues in Your Car’s AC Heater
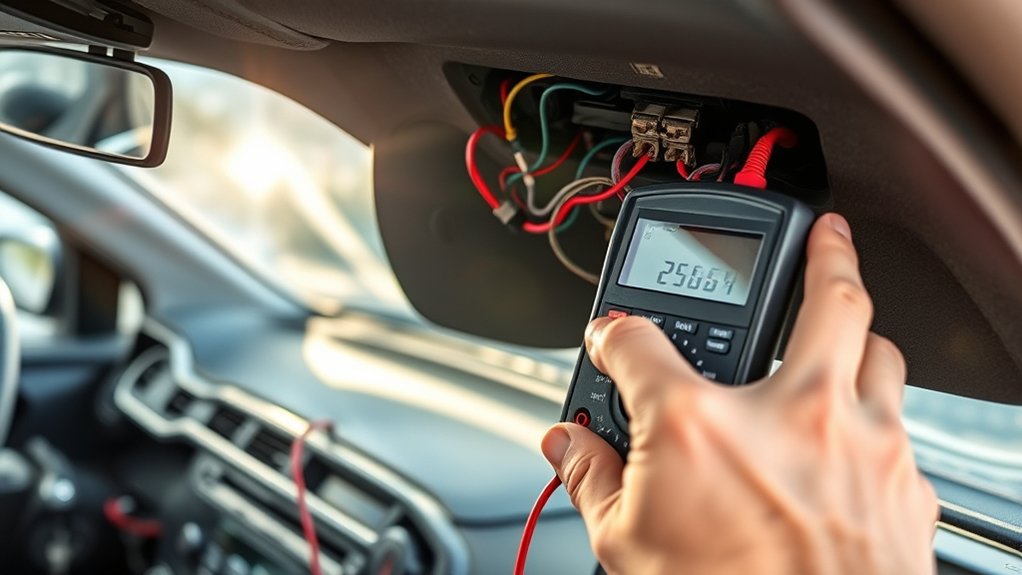
If your AC heater isn’t working properly, you might notice some common electrical symptoms, like flickering fans or no heat at all. These signs usually mean something’s up with the system.
To figure out what’s going on, you’ll want to test key heater components and check the wiring for any faults. It’s a good idea to take a close look at everything to catch any issues early.
Common Electrical Symptoms
Although electrical issues in your car’s AC heater can be tricky to pinpoint, recognizing common symptoms helps you diagnose problems efficiently. You might notice the climate control system acting erratically, with buttons unresponsive or settings changing on their own.
If your air filtration fan doesn’t turn on or works intermittently, it often signals electrical faults like a blown fuse or faulty wiring. Another sign is inconsistent blower speeds, which can indicate problems with the resistor or control module.
Flickering dashboard lights tied to the AC heater controls also hint at electrical glitches. By paying attention to these symptoms, you can narrow down potential issues before moving on to testing specific components, saving time and avoiding unnecessary repairs.
Testing Heater Components
How do you pinpoint which heater component is causing electrical issues in your car’s AC system? Start by testing key parts like the blower motor, resistor, and thermostat using a multimeter to check for continuity and voltage.
A faulty blower motor can disrupt airflow, directly impacting your cabin comfort. The resistor controls fan speeds, so if your climate control settings don’t respond correctly, this component might be the culprit.
Test the thermostat to ensure it’s accurately regulating temperature signals. Always disconnect the battery before testing to avoid shorts.
Diagnosing Wiring Problems
When your car’s AC heater experiences electrical issues, wiring problems often lie at the core and can be tricky to spot. Start by inspecting visible wires under the dashboard and near the heater box for signs of wear, corrosion, or loose connections.
Use a multimeter to test for continuity and ensure power reaches key components. Pay special attention to the fuse box and relays related to the climate control system, as a blown fuse or faulty relay can disrupt interior comfort.
If wiring looks damaged or connections are shaky, repair or replace them promptly. Fixing these issues restores proper electrical flow, helping your AC heater deliver consistent climate control and maintain a comfortable interior environment during every drive.
Check Your Heater Core for Blockages or Leaks
Wondering why your car’s heater isn’t blowing warm air? A common culprit is the heater core, which can develop blockages or leaks that reduce heat transfer. Checking it early can save you from bigger repairs.
Here’s how to inspect your heater core for issues:
- Look for coolant puddles inside the cabin or a sweet smell, signs of leaks.
- Feel for cold spots on the heater core’s hoses, indicating blockages.
- Use a pressure tester on the cooling system to detect leaks in the heater core.
- Flush the heater core to clear out any debris causing blockages.
If you find leaks or persistent blockages, replacing or professionally cleaning the heater core is the best solution. Addressing these problems restores proper heat flow and prevents engine overheating caused by coolant loss.
Test the AC Heater Thermostat and Temperature Controls
Now, you’ll want to test the thermostat to make sure it responds correctly to temperature changes. It’s important to see how it reacts when the temperature goes up or down.
Next, check if the temperature controls are calibrated properly. This ensures your settings are accurate and the system works just the way you want it to.
Also, take a close look at the sensors. Identifying any faults early on can help prevent issues that might disrupt the system’s overall performance.
Thermostat Functionality Check
Because the thermostat controls the temperature inside your vehicle, checking its functionality is essential when diagnosing AC heater issues. A faulty thermostat or temperature sensor can cause inconsistent cabin temperatures or prevent the heater from activating.
Follow these steps to test the thermostat functionality:
- Locate the thermostat and temperature sensor in your vehicle’s HVAC system.
- Use a multimeter to check for continuity in the thermostat; no continuity indicates the need for thermostat replacement.
- Inspect the temperature sensor for physical damage or corrosion that could affect readings.
- Compare the sensor’s resistance readings to manufacturer specifications to ensure accurate temperature detection.
If either component fails these tests, replacing them will often resolve heating problems and restore proper temperature control.
Temperature Control Calibration
Although you’ve checked the thermostat and temperature sensor, you still need to verify that the temperature controls are properly calibrated to guarantee your AC heater responds accurately. Start by comparing the set temperature on your control panel with the actual temperature inside the vehicle.
If there’s a discrepancy, perform a temperature calibration to align the controls with real conditions. This often involves accessing the control unit settings to adjust the temperature offset. Make precise control adjustments incrementally, then test the response after each change.
Proper temperature calibration ensures the AC heater activates or deactivates at the right points, preventing discomfort and inefficiency. Skipping this step can lead to inconsistent heating performance, so take time to confirm your controls are accurately tuned before moving on.
Diagnosing Sensor Issues
When your AC heater isn’t responding correctly, the thermostat and temperature sensors are usually the first components you should test. Accurate sensor calibration is essential for proper temperature regulation.
Start by using diagnostic tools to check for error codes related to sensor malfunction. Then, follow these steps:
- Inspect the thermostat for physical damage or corrosion.
- Use a multimeter to measure the sensor’s resistance, comparing it to manufacturer specs.
- Verify the sensor’s output voltage with diagnostic tools while adjusting temperature controls.
- Recalibrate or replace sensors if readings fall outside acceptable ranges.
Inspect the AC Heater Blower Motor and Fan
Before you investigate further into diagnosing your AC heater issues, start by inspecting the blower motor and fan, since they play an essential role in circulating air through your vehicle’s heating system. First, check the blower motor for any signs of damage or wear. Listen for unusual noises like grinding or squealing, which often indicate a failing motor.
Next, examine the fan assembly for debris, dirt buildup, or broken blades that could obstruct airflow or cause imbalance. Make sure the fan spins freely without resistance. If the blower motor isn’t running or the fan isn’t moving properly, it can lead to poor air circulation and uneven heating inside your car.
Testing the electrical connections to the blower motor is also important. Loose or corroded wiring can cause intermittent performance. By thoroughly inspecting these components, you’ll identify key issues early and guarantee your AC heater system delivers consistent airflow and comfort.
Fix Refrigerant Leaks Affecting Your Car’s AC and Heater Performance
You’ll want to start by looking for common sources of refrigerant leaks, like hoses and connections. Using leak detection methods, such as UV dye or electronic detectors, can really help you pinpoint the issue quickly.
Once you find the leak, you’ll need to repair it and then recharge the system. This will get your AC and heater working properly again.
Identifying Common Leak Sources
Leaks in your car’s AC system can quickly reduce cooling efficiency and even impact heater performance by letting refrigerant escape. When you notice a drop in interior comfort or inconsistent climate control, checking common leak sources is essential.
Here are four key areas to inspect:
- AC Compressor Seals – These seals can wear out, allowing refrigerant to leak.
- Condenser Coils – Damage or corrosion here often leads to leaks.
- Hoses and Connections – Cracks or loose fittings reduce system pressure.
- Evaporator Core – Though harder to access, leaks here considerably affect performance.
Using Leak Detection Methods
After pinpointing where refrigerant might be escaping, the next step is to confirm the leaks using reliable detection methods. You can start with a UV dye, which you add to the system. Using a UV light, you’ll spot the glowing dye at leak points.
Electronic leak detectors are another option. They sense refrigerant gases and alert you instantly. Both methods guarantee accuracy while prioritizing automotive safety and preventing exposure to harmful chemicals.
Finding leaks early helps maintain your engine performance by avoiding refrigerant loss that can cause your AC and heater to work harder. Remember to wear protective gloves and goggles during this process.
Proper leak detection not only safeguards your vehicle’s climate control but also keeps your engine running smoothly and efficiently.
Repairing and Recharging System
Once you identify the source of a refrigerant leak, repairing it promptly guarantees your car’s AC and heater perform at their best. Fixing leaks ensures ideal climate control and interior comfort, keeping you cool or warm as needed.
Here’s how to tackle the repair and recharge:
- Locate and replace damaged hoses, seals, or components causing the leak.
- Use a UV dye or electronic leak detector to confirm the repair’s effectiveness.
- Evacuate the system with a vacuum pump to remove moisture and air.
- Recharge the system with the correct type and amount of refrigerant specified by your car’s manufacturer.
Following these steps restores your system’s efficiency, maintaining reliable climate control and interior comfort during every drive.
When to Replace the Heater Control Valve or Actuator
Although heater control valves and actuators often work quietly in the background, you’ll know it’s time to replace them when your car’s heating system fails to regulate temperature properly or stops responding to your controls. If you notice uneven heating, no heat output despite the system being on, or the temperature fluctuates without input, these are strong signs that the heater control valve or actuator is malfunctioning.
A faulty heater control valve may leak or get stuck, blocking hot coolant flow, while a broken actuator can’t adjust the blend door to direct airflow correctly. Actuator replacement becomes necessary if you hear clicking noises from behind the dashboard or if your temperature settings don’t match the actual cabin temperature.
Addressing these symptoms early helps restore your heating system’s efficiency and prevents further damage. Don’t ignore persistent heating issues; they often indicate it’s time for a heater control valve or actuator replacement to keep your car warm and comfortable.
Should You DIY or Call a Pro for AC Heater Repairs?
How do you decide whether to tackle AC heater repairs yourself or call in a professional? It comes down to your comfort level, the tools you have, and how complex the issue is. DIY projects can save money and feel rewarding, but some repairs need a professional to ensure safety and accuracy.
Deciding on AC heater repairs depends on your comfort, tools, and the problem’s complexity.
Consider these factors before starting:
- Complexity of the Problem – Simple fixes like replacing a fuse or cleaning vents are perfect for DIY projects.
- Tools and Equipment – Specialized tools for AC heater parts usually mean it’s best to leave it to the pros.
- Time and Skill – If you’re short on time or unsure about the repair, getting a professional inspection can help avoid costly mistakes.
- Warranty and Safety – Repairs involving refrigerants or electrical parts might void warranties or pose risks without expert handling.
Weigh these points carefully to decide if a DIY approach works for you or if calling a pro is the safer choice.
Keep Your Car’s AC Heater Running Smoothly With These Maintenance Tips
To keep your car’s AC heater running smoothly, you need to perform regular maintenance that prevents common issues before they start. Begin by checking and replacing the air filter and cabin air filter as recommended in your vehicle’s manual. A clogged air filter reduces airflow, straining the system and lowering efficiency. Likewise, a dirty cabin air filter can cause unpleasant odors and reduce air quality inside your car.
Next, inspect the AC heater’s components for leaks or damage. Make sure coolant levels are adequate since low coolant affects heater performance. Running the system regularly, even in off-seasons, helps keep the seals lubricated and prevents blockages.
Finally, keep the vents clean and free from debris. Regularly vacuum the interior and wipe down vents to prevent dust buildup that can hinder airflow. By sticking to these maintenance tips, you’ll extend the life of your AC heater and enjoy consistent, comfortable rides year-round.
Frequently Asked Questions
How Do I Know if My Car’s AC Heater Uses R134A or R1234YF Refrigerant?
You can identify your car’s refrigerant by checking the refrigerant identification label under the hood or on the AC system components. It usually specifies whether your system uses R134a or R1234yf.
Also, consider your vehicle’s model year, as newer cars typically use R1234yf for system compatibility and environmental reasons. If unsure, consult your owner’s manual or a professional to avoid mixing refrigerants, which can damage your AC system.
Can Low Engine Coolant Affect My Car’s Heater Performance?
Yes, low coolant level can definitely affect your car’s heater performance. Your heater core relies on hot engine coolant to warm the air that blows into your cabin.
If the coolant level drops too low, the heater core won’t get enough heat, making your heater blow cold or lukewarm air. Always check your coolant level regularly and top it off to guarantee your heater works properly and keeps you comfortable.
What Tools Are Needed for Basic AC Heater Repairs?
Think of your car’s AC system like a garden: without the right tools, you can’t nurture it properly. For basic AC heater repairs, you’ll need a refrigerant recharge kit to restore cooling power and a manifold gauge set to check pressures.
Don’t forget a wrench set for compressor repair and hose replacements. These tools help you maintain your system’s health, ensuring comfort without calling a mechanic every time.
How Often Should I Replace the Cabin Air Filter?
You should replace your cabin air filter every 12,000 to 15,000 miles or at least once a year to maintain proper air filter maintenance. If you drive in dusty or polluted areas, consider changing it more often.
Regularly replacing the cabin air filter guarantees better cabin air quality, prevents odors, and keeps your AC and heater running efficiently. Don’t wait; staying on top of this simple task improves your comfort and health inside the car.
Does Using Aftermarket Parts Void My AC Heater Warranty?
Using aftermarket parts doesn’t automatically void your warranty coverage for your AC heater. However, if the aftermarket part causes damage, the warranty may not cover repairs related to that damage.
To protect yourself, always check your vehicle’s warranty terms carefully. You can also opt for OEM parts or verify the aftermarket parts meet quality standards.
This way, you keep your warranty intact while maintaining your car’s AC heater system effectively.
Conclusion
If your car’s AC heater is acting up, you’re not alone. Studies show that nearly 30% of vehicles experience HVAC issues within five years. By diagnosing electrical faults, checking for leaks, and testing controls, you can often fix problems yourself.
However, don’t hesitate to call a pro if needed. Regular maintenance is key to keeping your AC heater running smoothly and avoiding costly repairs down the road. Stay proactive and comfortable on every drive by taking care of your AC heater car repair.