10 Essential Motor Auto Repair Tips
Keeping your car in top shape can feel overwhelming, especially when unexpected engine troubles pop up. You’re not alone—many people struggle with maintaining their vehicles and wish there was an easier way to prevent costly repairs. That’s why we’ve put together these 10 essential motor auto repair tips to help you keep your engine running smoothly and enjoy hassle-free driving.
To keep your engine running smoothly, check your oil regularly with the engine cool and top it up as needed. Change your oil and filter on time, and replace air filters to maintain performance. Watch for coolant leaks and inspect belts and hoses for wear.
Keep spark plugs and the fuel system in good shape, and test your battery connections often. These simple steps prevent costly repairs and boost reliability—explore how to master each for hassle-free driving.
Key Takeaways
- Regularly check and maintain engine fluids, including oil and coolant, to prevent costly repairs and engine overheating. Keeping these fluids in good shape helps your engine run smoothly.
- Change engine oil and filters on schedule, and inspect belts and hoses for wear or damage to ensure reliable performance. Staying on top of these tasks avoids unexpected breakdowns.
- Inspect and replace spark plugs promptly to maintain engine efficiency and prevent misfires or starting issues. Healthy spark plugs keep your engine firing properly.
- Keep the battery terminals clean and check electrical connections to avoid power failures and maintain system reliability. A clean, secure battery connection means fewer starting problems.
- Perform preventative maintenance to catch issues early, extend component lifespan, and save money on major repairs. It’s easier to fix small problems before they become big headaches.
How to Check Your Engine Oil Level

Before you start your engine, make certain it’s cool and parked on level ground so you get an accurate oil reading. Open the hood and locate the dipstick, usually marked with a bright handle. Pull it out, wipe it clean with a rag, then reinsert it fully before pulling it out again to check the oil level.
Check oil level only when the engine is cool and the car is on level ground for accuracy.
The oil should be between the minimum and maximum marks. If it’s low, top it up with the recommended oil type.
While you’re under the hood, it’s a good idea to glance at other essential fluids too. Check your brake fluid level to ensure your braking system works properly. Also, don’t forget to inspect your tire pressure regularly. It affects fuel efficiency and safety.
Keeping these basics in check, along with your engine oil, helps your vehicle run smoothly and prevents costly repairs down the road. Regular attention to these details keeps you safe and your car in top shape.
How to Change Your Engine Oil Safely
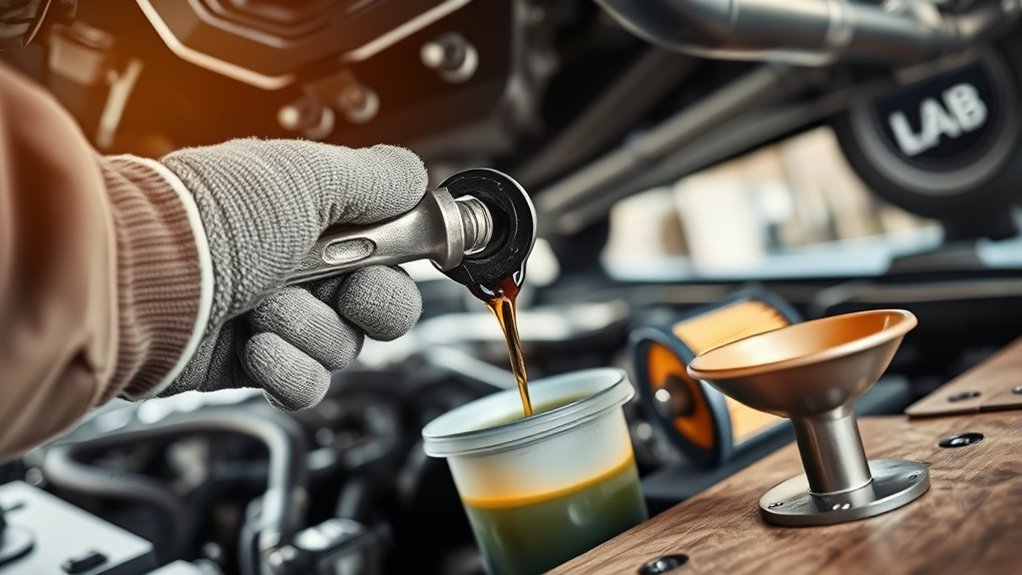
When you’re ready to change your engine oil, make sure the car is parked on a level surface with the engine cool. This helps prevent burns and ensures an accurate drain. Start by placing a container beneath the oil drain plug, then carefully remove the plug to let the old oil flow out completely.
While waiting, remove and replace the oil filter to maintain proper engine tuning and performance. After the oil has drained, reinstall the drain plug securely. Pour the recommended type and amount of fresh oil into the engine through the filler cap.
Don’t forget to check the level with the dipstick to make sure it’s correct. Finally, dispose of the used oil responsibly by taking it to a recycling center. Oil recycling helps protect the environment and complies with local regulations.
Changing your engine oil safely not only keeps your car running smoothly but also extends its lifespan.
When and How to Replace Your Air Filter

Regularly changing your engine oil keeps your vehicle running smoothly, but don’t overlook the air filter. It plays an essential role in your engine’s performance too. The air filter lifespan typically ranges from 12,000 to 15,000 miles, but this depends on your driving conditions.
Regularly changing your air filter is key to maintaining engine performance alongside routine oil changes.
If you drive in dusty or polluted areas, check it more often. Replacing your air filter guarantees clean air flows into your engine, improving fuel efficiency and reducing emissions.
Don’t forget the cabin air filter, which cleans the air you breathe inside your car. It usually needs replacement every 15,000 to 20,000 miles or annually.
To replace your engine’s air filter, open the air filter housing, remove the old filter, and insert a new one, making sure it fits snugly. For the cabin air filter, locate its compartment, often behind the glove box, remove the old filter, and install a new one.
Regular replacements keep your engine healthy and cabin air fresh.
Signs Your Spark Plugs Need Replacing
If your car starts misfiring or struggling to accelerate, your spark plugs might be worn out and need replacing. Spark plug fouling can cause incomplete combustion, which leads to rough idling and poor engine performance. When your ignition timing is off because of faulty spark plugs, you’ll notice decreased fuel efficiency and difficulty starting the engine.
Here are signs you should check your spark plugs:
- Engine misfires or hesitation: This often points to spark plug fouling or wear.
- Reduced fuel economy: Worn plugs disrupt ignition timing, causing inefficient fuel burn.
- Trouble starting your car: Old plugs can weaken the spark needed for ignition.
Regularly inspecting your spark plugs helps maintain smooth engine operation. If you detect any of these signs, replace your spark plugs promptly to avoid further engine damage and keep your vehicle running efficiently.
How to Spot Coolant Leaks Early
Although coolant leaks can start small, they quickly lead to overheating and engine damage if left unchecked. To spot them early, regularly check under your car for puddles or wet spots, paying close attention to the coolant color. It’s usually bright green, orange, or pink.
Identifying the leak location helps you address the problem faster. Inspect around the radiator, hoses, water pump, and the coolant reservoir for any dampness or crusty residue.
You should also open the hood when the engine is cool and look for any signs of coolant pooling or corrosion. If you spot a leak, note whether it’s dripping directly or seeping slowly. Early detection lets you fix minor issues before they escalate.
How to Diagnose Engine Overheating Problems
If your engine’s running hotter than usual, it’s a good idea to start by checking some common causes like low coolant or a faulty thermostat. You’ll want to take a close look at the cooling system, including the radiator, hoses, and water pump.
Catching these issues early can really save you from serious engine damage down the line. So, don’t wait too long to give everything a thorough inspection!
Common Overheating Causes
When your engine starts running hotter than usual, you need to pinpoint the cause quickly to prevent serious damage. While electric vehicles and hybrid engines handle heat differently, traditional combustion engines share common overheating causes you should watch for.
Coolant leaks: Low coolant levels prevent proper heat dissipation, leading to overheating.
Faulty thermostat: If it sticks closed, coolant flow stops, causing the engine to overheat.
Radiator issues: Blockages or damage reduce cooling efficiency, raising engine temperature.
Recognizing these issues early can save you costly repairs. Even if you drive a hybrid or electric vehicle, understanding overheating causes helps you stay alert to potential problems and maintain your vehicle’s performance.
Cooling System Checks
Since overheating can damage your engine quickly, you’ll want to perform thorough cooling system checks as soon as you notice rising temperatures. Start by inspecting the radiator for leaks, corrosion, or blockages. Proper radiator maintenance is vital for ideal heat dissipation.
Next, check the coolant mixture. An incorrect ratio of antifreeze to water can reduce cooling efficiency and cause overheating. Make sure the coolant level is adequate and top it off if needed.
Also, examine hoses and clamps for cracks or looseness that might cause leaks. Don’t forget to test the thermostat and water pump. If they malfunction, coolant circulation suffers.
Why You Should Inspect Your Timing Belt Regularly
You should check your timing belt regularly to spot any signs of wear, like cracks or fraying, before they cause trouble. It’s a good idea to catch these issues early because it can help you avoid costly engine damage.
Timing Belt Wear Signs
Regularly inspecting your timing belt can save you from costly engine damage. During timing belt inspection, you should look for specific belt wear indicators that signal it’s time for a replacement. These signs help you catch problems early before they escalate.
Watch out for cracks or fraying along the belt edges, which show the material is breaking down. Also, keep an eye out for glazing or shiny surfaces that indicate slipping and heat damage. Missing teeth or uneven wear can disrupt proper engine timing, so those are important signs too.
Preventing Engine Damage
Although timing belts may seem like a small component, neglecting their inspection can lead to severe engine damage and costly repairs. You should regularly check your timing belt because a worn or broken belt can cause valves and pistons to collide, ruining your engine.
Using engine diagnostics tools helps you spot early signs of belt wear before it’s too late. This preventative step not only protects your engine but also supports peak performance tuning, ensuring your vehicle runs smoothly and efficiently.
Skipping timing belt inspections risks unexpected breakdowns and expensive fixes. By staying proactive and inspecting your timing belt as recommended, you’ll maintain engine reliability and save money in the long run.
When and How to Replace Engine Belts and Hoses
Since engine belts and hoses play essential roles in your vehicle’s performance, knowing when and how to replace them can prevent costly breakdowns. Engine belt maintenance is important because worn belts can cause overheating or loss of power steering. Likewise, hose inspection helps you spot cracks, leaks, or bulges that mean it’s time to replace them.
To keep your engine running smoothly, follow these tips:
- Check belts for fraying, glazing, or cracks every 30,000 miles or as recommended.
- Inspect hoses for softness, brittleness, or leaks during routine oil changes.
- Replace belts and hoses right away if you notice damage or hear unusual noises.
Replacing belts usually involves loosening the tensioner, removing the old belt, and fitting a new one properly. For hoses, you’ll need to drain the coolant, detach clamps, remove the hose, and install a new one securely. Regular attention to these parts keeps your engine reliable and efficient.
How to Maintain Your Engine’s Fuel System
If you want your engine to run efficiently and avoid costly repairs, you need to maintain the fuel system properly. Start by using quality fuel and regularly adding fuel additives designed to clean injectors and prevent buildup.
These additives not only keep your fuel lines and injectors clear but also improve fuel efficiency by ensuring smooth fuel delivery. Avoid letting your fuel tank run too low, as this can cause sediment to clog the fuel filter.
Replace the fuel filter according to your vehicle’s maintenance schedule to keep contaminants out of the engine. Inspect fuel lines for cracks or leaks and fix them promptly to prevent fuel loss and safety hazards.
How to Test Your Battery and Electrical Connections
To keep your vehicle running smoothly, you should regularly test your battery and electrical connections. Battery testing helps you avoid unexpected breakdowns and guarantees your car starts reliably. Electrical diagnostics can identify corrosion, loose wires, or faulty components early, saving you time and money.
Start by inspecting your battery terminals for corrosion or buildup. Next, use a multimeter to measure the battery voltage; a healthy battery reads around 12.6 volts when the car is off. Finally, check your electrical connections for tightness and damage.
- Clean terminals with a wire brush and baking soda solution.
- Measure voltage with a multimeter for accurate battery testing.
- Tighten or replace loose or damaged electrical connections.
Regular battery testing and electrical diagnostics let you catch issues before they escalate, keeping your vehicle’s electrical system efficient and reliable. Don’t skip these simple steps. They’re essential for your car’s health.
Frequently Asked Questions
How Often Should I Get a Professional Engine Tune-Up?
You should get a professional engine tune-up every 30,000 to 50,000 miles, but always check your vehicle’s manual. Regular engine diagnostics during tune-ups help catch issues early, keeping your car running smoothly.
Also, don’t forget to maintain your oil change frequency, usually every 3,000 to 5,000 miles, depending on your oil type. Staying on top of these services guarantees better performance and prevents costly repairs down the road.
What Are the Best Tools for Basic Motor Auto Repairs?
You need diagnostic tools, hand tools, and safety gear. Start with diagnostic tools like an OBD-II scanner to pinpoint engine issues quickly.
Then, grab hand tools such as wrenches, screwdrivers, and pliers for everyday repairs. Don’t forget a socket set and a torque wrench to tighten bolts correctly.
With these tools, you’ll tackle basic motor repairs confidently and efficiently, saving time and avoiding costly mistakes.
How Can I Improve My Car’s Fuel Efficiency?
You can improve your car’s fuel efficiency by regularly checking and maintaining proper tire pressure, as underinflated tires increase rolling resistance. Switching to eco-friendly fuels also helps reduce emissions and can boost mileage, depending on your vehicle.
Moreover, avoid aggressive driving and unnecessary idling to conserve fuel. Keeping your engine well-tuned and replacing air filters on time further elevates efficiency. These simple steps make your car run cleaner and save you money at the pump.
What Safety Precautions Should I Take Before Starting Repairs?
Before you start repairs, put on your safety gear: gloves, goggles, and a sturdy pair of shoes. Accidents love to happen when you least expect them.
Then, run through an inspection checklist. Disconnect the battery, check for leaks, and make sure your workspace is well-ventilated. Taking these precautions not only protects you but also helps you spot potential hazards early.
That way, you can fix your car confidently and safely every time.
When Is It Necessary to Replace the Catalytic Converter?
You need to replace the catalytic converter when it’s clogged, damaged, or causing your car to fail emissions tests. Signs like a drop in engine performance, rattling noises, or the check engine light can signal replacement urgency.
Ignoring these signs can lead to worse engine damage or increased pollution. So, if you notice these symptoms, prioritize the catalytic converter replacement to keep your vehicle running smoothly and legally.
Conclusion
You might think your car’s engine will just fix itself, but sadly, it won’t. Ignoring these simple tips won’t make problems disappear; they’ll only grow.
So, unless you enjoy surprise breakdowns and unexpected repair bills, take a few minutes to check your oil, belts, and battery. Trust me, your car will thank you by actually starting when you need it, instead of plotting its next inconvenient breakdown. Keeping up with essential motor auto repair tips is the best way to avoid those headaches.