
10 Essential Steps for an Automotive Oil Change
If you’ve ever tried Automotive Oil Change your car’s oil, you know it can feel overwhelming and confusing. You’re not alone—many people struggle with knowing the right steps and tools to use. But mastering this essential maintenance task can save you money and keep your engine running smoothly.
To change your oil, first gather the right tools and oil type. Then park on a flat surface and engage the parking brake.
Locate and remove the drain plug to drain old oil. Follow this by removing and replacing the oil filter.
Check oil levels with the dipstick before starting the engine to spot leaks.
Afterward, dispose of used oil responsibly and keep a maintenance record.
Stick with these steps, and you’ll keep your engine running smoothly and reliably.
Key Takeaways
- Gather the correct oil, filter, and tools, and prepare your vehicle on a flat surface with the engine cool and parking brake engaged.
- Locate and remove the drain plug to fully drain old oil into a properly positioned drain pan, then securely reinstall the plug.
- Remove the old oil filter, clean the mounting surface, apply oil to the new filter gasket, and install it hand-tightened without over-tightening.
- Add recommended oil type gradually. Start the engine to circulate oil, check for leaks, then recheck and adjust oil level with the dipstick.
- Dispose of used oil and filters responsibly at authorized centers and maintain detailed records to adhere to regular oil change intervals.
Gather Tools and Oil for Your Change

Before you begin your oil change, make sure you have all the necessary tools and the correct type of oil for your vehicle. Start by checking your owner’s manual to identify the recommended oil viscosity, which guarantees proper lubrication and engine protection.
Ensure you have the right tools and oil viscosity from your owner’s manual before starting your oil change.
Selecting the right oil viscosity is vital because using oil that’s too thick or too thin can affect engine performance. You’ll also want to pick oil with the appropriate additives, which improve properties like cleaning, corrosion resistance, and wear protection.
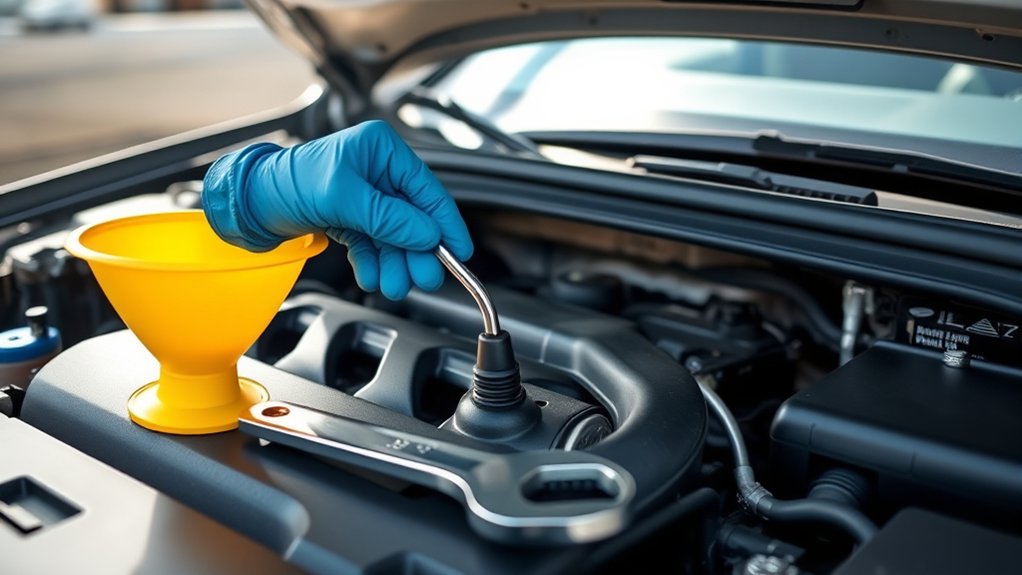
Gather essential tools including a wrench or socket set for the drain plug, an oil filter wrench, a drain pan, and a funnel for pouring oil without spills. Don’t forget gloves and rags to keep things tidy.
Having everything ready before you start will save time and help you perform the oil change smoothly, safeguarding your engine and extending its life.
Prepare Your Vehicle: Safety Checks Before You Begin
While you gather your tools, take a moment to make certain your vehicle is parked on a flat, stable surface with the engine cool to avoid burns. This setup guarantees safety and prevents accidents.
Before starting, check your tire pressure to confirm it’s within the recommended range. Properly inflated tires improve stability while you work and prevent unexpected movement.
Next, perform a quick brake inspection by pressing the brake pedal and looking for firmness or any unusual resistance. This helps ensure your vehicle won’t roll during the oil change. Also, engage the parking brake firmly to keep the car stationary.
Double-check that your workspace is well-lit and free of clutter to avoid tripping hazards. Taking these safety steps before you begin protects you and prepares your vehicle for a smooth, efficient oil change process. Staying cautious now will make the entire task safer and easier.
Locate the Oil Drain Plug and Position the Drain Pan

First, you’ll want to find the oil drain plug underneath your vehicle. It’s usually located at the bottom of the oil pan. Once you spot it, go ahead and position your drain pan directly beneath the plug to catch the old oil as it drains out. Make sure the pan is steady and lined up right to avoid any spills.
Finding the Drain Plug
Where exactly is the oil drain plug located on your vehicle? Finding it is essential before you can change your oil properly. Typically, the drain plug is a large bolt underneath the oil pan.
To locate it quickly, first safely lift your car and secure it with jack stands. Then look beneath the engine for the oil pan, which is a flat, metal container holding oil.
Find the drain plug at the lowest point of the oil pan; it’s usually distinct and easy to spot. Also, identify the oil filter nearby. It’s often a round, canister-shaped part close to the drain plug.
Once you spot the drain plug, you’re ready to proceed with loosening it carefully to drain the old oil. Knowing these points saves time and prevents frustration.
Proper Drain Pan Placement
After locating the oil drain plug beneath your vehicle, the next step is to position your drain pan correctly to catch the old oil. Place the drain pan directly under the plug, ensuring it’s centered to avoid spills.
Proper drain pan positioning is crucial for oil spill prevention, keeping your workspace clean and safe. Make sure the pan is large enough to hold all the oil and stable on the ground to prevent tipping. Double-check the area to confirm it won’t shift when you remove the drain plug.
Taking these precautions helps you avoid messy cleanup and environmental hazards. With the drain pan securely in place, you’re ready to loosen the drain plug and let the oil flow smoothly into the pan.
Drain the Old Oil From Your Engine
Before you start draining the old oil, make sure your engine is warm but not hot to help the oil flow out smoothly. Warm oil has lower viscosity, allowing it to drain more completely. This removes contaminants and used oil additives that have broken down over time.
Warm your engine before draining oil to ensure smoother flow and better removal of contaminants.
Here’s how to drain the oil efficiently:
- Locate the drain plug beneath the engine and place your drain pan perfectly underneath.
- Use the correct wrench to loosen the drain plug carefully. Don’t strip it.
- Allow the oil to drain fully. This ensures old oil additives and sludge exit your engine.
- Once drained, reinstall the drain plug securely to prevent leaks.
Remove and Replace the Oil Filter
How do you guarantee your engine stays clean and runs smoothly after draining the old oil? The answer lies in proper oil filter replacement. Start by locating the oil filter and using an oil filter wrench to loosen it. Be prepared for some residual oil to spill out, so have a catch pan ready.
Once removed, clean the mounting surface thoroughly to ensure a proper seal. Before installing the new filter, apply a thin layer of fresh oil to the rubber gasket. This simple step improves filter sealing techniques, preventing leaks.
Screw the new filter on by hand until the gasket contacts the mounting surface, then tighten it about three-quarters of a turn more. Avoid over-tightening. Oil filter replacement is essential because the filter traps contaminants that degrade engine performance.
Add the Right Oil for Your Vehicle
Now that you’ve replaced the old oil filter, it’s time to add the right oil for your vehicle. Be sure to pick the correct oil type by checking your manufacturer’s recommendations in the owner’s manual. Using the proper oil helps your engine run smoothly and keeps it well protected.
Choosing Correct Oil Type
Which type of oil suits your vehicle best? Choosing the correct oil type is essential to keep your engine running smoothly. You’ll mainly encounter three types: synthetic, synthetic blend, and mineral oil. Here’s how to decide:
- Synthetic Oil offers superior protection and lasts longer. It’s perfect if you want top performance.
- Synthetic Blend is a balanced choice, combining benefits of synthetic and mineral oil. It’s ideal if you want good protection without a high cost.
- Mineral Oil is a traditional option, less expensive but requires more frequent changes. It’s suitable for older engines.
- Consider Climate as well. Thicker oils perform better in hot weather, while thinner oils work best in colder climates.
Picking the right oil type guarantees your engine stays healthy and efficient.
Checking Manufacturer Recommendations
Although you might have a preferred oil type, always check your vehicle’s manufacturer recommendations before adding oil. These manufacturer guidelines are based on extensive testing and guarantee your engine runs smoothly and efficiently.
Ignoring them could lead to poor performance or even damage. Look up your vehicle specifications in the owner’s manual or on the manufacturer’s website to find the recommended oil viscosity and type.
Using oil that matches these specifications helps maintain ideal engine temperature and protects internal components. Even if you’re in a hurry, taking a moment to verify the right oil prevents costly repairs later.
Check Oil Level With the Dipstick
Before you add new oil, you’ll want to check the current level using the dipstick to make certain your engine has enough lubrication. Using the proper dipstick technique ensures an accurate reading, which is crucial for your engine’s health. Here’s how to get it right:
- Pull out the dipstick and wipe it clean with a lint-free cloth.
- Reinsert it fully, then pull it out again to check the oil level against the marked indicators.
- Note the oil’s viscosity. If it looks too thick or thin compared to what your manufacturer recommends, it’s time for a change.
- If the level is below the minimum mark, add oil gradually, making sure you choose the correct oil viscosity specified for your engine.
Mastering this step keeps your engine running smoothly and prevents costly damage. It’s a simple, quick check that makes a big difference.
Start the Engine and Check for Leaks
How can you be sure your oil change was successful? Once you’ve added the new oil and replaced the filter, start the engine and let it run for a few minutes. This allows the engine temperature to rise to its normal operating range, helping the new oil circulate throughout the system.
As you do this, keep an eye on the oil pressure gauge or warning light. Steady oil pressure indicates that the oil pump is working properly and the oil is flowing as it should.
While the engine runs, check underneath your vehicle for any signs of leaks around the drain plug, oil filter, and oil pan. Catching leaks early prevents damage and mess.
If you see no drips and the oil pressure holds steady, you’ve likely completed the oil change correctly. After shutting off the engine, wait a few minutes, then recheck the oil level with the dipstick to ensure it’s at the recommended mark.
Dispose of Used Oil and Filters Properly
You need to dispose of used oil and filters properly to protect the environment from harmful contaminants. So, make sure to take them to authorized disposal locations where they can be recycled safely. Recycling used oil doesn’t just reduce pollution—it also helps conserve valuable resources. It’s a simple step that makes a big difference!
Environmental Impact Awareness
Why does proper disposal of used oil and filters matter so much? Because your actions directly impact the environment. When you adopt eco-friendly practices, you actively contribute to pollution reduction and protect ecosystems. Here’s why it’s essential:
- Used oil contains toxins that can contaminate soil and water.
- Improper disposal harms wildlife by polluting habitats.
- Recycling oil reduces the need for new oil extraction, saving resources.
- Responsible filter disposal prevents hazardous waste buildup.
Authorized Disposal Locations
Where can you safely dispose of used oil and filters to protect the environment? You must take them to authorized disposal locations that handle hazardous waste correctly. Many auto shops, recycling centers, and municipal hazardous waste facilities accept used oil and filters.
These locations comply with disposal regulations designed to prevent soil and water contamination. Never dump oil or filters in drains, on the ground, or in regular trash. Before disposal, store used oil and filters in sealed, labeled containers to avoid leaks.
Check local guidelines to find the nearest authorized disposal site and follow their procedures closely. By disposing of used oil and filters properly, you’re not only following the law but also actively protecting the environment from harmful pollutants.
Recycling Benefits Explained
Although disposing of used oil and filters properly requires extra effort, recycling them offers significant environmental and economic benefits. When you recycle, you help reduce pollution, conserve natural resources, and support sustainable practices. The recycling benefits go beyond just protecting the environment. They also save energy and reduce waste.
Here’s why you should care about recycling your used oil and filters:
- Prevents soil and water contamination from hazardous waste.
- Saves energy by reprocessing oil instead of producing new oil.
- Conserves finite natural resources by reusing valuable materials.
- Supports local recycling programs and green jobs.
Keep Track of Your Oil Change Schedule
Keeping a consistent oil change schedule helps your engine perform smoothly and extends its lifespan. To stay on top of your vehicle’s health, use maintenance reminders that alert you when it’s time for the next oil change.
These reminders help you avoid missing essential oil change intervals, preventing engine wear and costly repairs.
Track your oil changes by noting the date and mileage each time you service your vehicle. Here’s a simple table to help you organize this information:
| Date | Mileage | Notes |
|---|---|---|
| 01/10/2024 | 25,000 mi | Used synthetic oil |
| 04/15/2024 | 30,000 mi | Checked filter |
| 07/20/2024 | 35,000 mi | Scheduled next |
Frequently Asked Questions
How Often Should I Change My Oil Based on Driving Conditions?
You should change your oil every 3,000 to 5,000 miles under normal driving conditions. But if you drive in severe conditions like stop-and-go traffic or extreme temperatures, do it more often.
Pay attention to the oil viscosity recommended for your vehicle, as thicker or thinner oil affects how often you need a change. Don’t forget to replace the oil filter each time to keep your engine running smoothly.
What Are the Signs My Engine Oil Needs Changing Immediately?
You might think your oil’s fine just because it looks dark, but that’s not always true. If you notice your engine struggling or a drop in engine performance, your oil’s viscosity may be off. That means it’s too thick or thin to protect properly.
Also, watch for the oil change light or unusual engine noises. These signs mean you need to change your oil immediately to avoid damage.
Can I Switch Between Synthetic and Conventional Oil Types?
Yes, you can switch between synthetic and conventional oil types, but you should pay attention to oil viscosity to guarantee it matches your engine’s requirements. Synthetic oil offers benefits like better protection, improved performance in extreme temperatures, and longer intervals between changes.
Just make sure to fully drain the old oil before switching to synthetic to avoid mixing. Mixing can reduce the effectiveness of synthetic benefits and affect your engine’s health.
How Does Oil Change Affect My Vehicle’s Warranty?
Your oil change can impact your vehicle’s warranty if you don’t follow manufacturer requirements. Skipping recommended oil types or service intervals might lead to warranty implications, as manufacturers expect you to maintain your car properly.
Always use the specified oil and keep detailed records of changes. That way, you’ll protect your warranty and avoid potential disputes if a problem arises related to engine maintenance.
What Happens if I Overfill the Engine Oil?
If you overfill the engine oil, it’s like trying to fit an ocean into a teacup. It can be disastrous! You risk causing an oil spill inside the engine, which can lead to serious engine damage.
Excess oil can foam, reducing lubrication and causing parts to wear out faster. It may also damage seals and gaskets, leading to leaks. Always stick to the recommended oil level to keep your engine running smoothly.
Conclusion
Now that you’ve completed these essential steps, you might think you’re done, but don’t rush just yet. There’s one final check that can save you from costly mistakes.
Will your engine run smoothly without leaks? Can you trust your work until the next oil change? Take a moment, start the engine, and watch closely.
Your car’s health depends on it, and you’re closer than ever to mastering this vital skill in automotive oil change.